Sales commissions are a great way to keep your sales team motivated to generate more business and increase the organization’s revenue. With D365 F&O you can effectively process and track the sales commissions in your organization. In this blog, we will discuss how to set up sales commissions for your organization, calculate and track sales commissions.
Setup
Before you begin to track the sale commissions in your organizations, there are some basic setups that need to be completed.
Setup Commission customer group
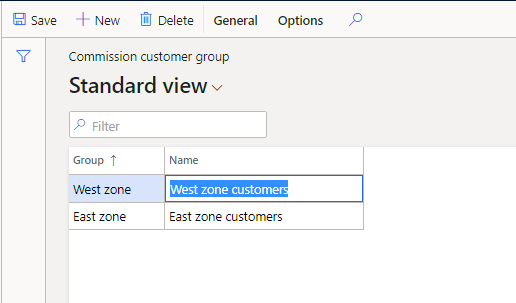
To begin with, you will need to set up a Commission customer group. The commission customer group is used to calculate commission for a customer. You can create several categories that you can then assign to your customer.
Go to Sales and marketing> Commissions> Customer groups for commission.
Click New to create unique groups that suit your business process and save.
Setup Commission Item groups
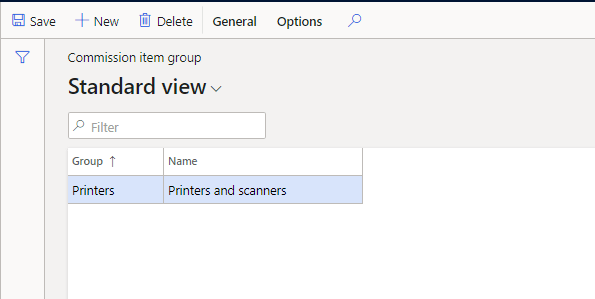
Commission Item groups help you categorize your items or products that are eligible for commissions.
To set up Commission item group, navigate to Sales and marketing> Commissions> Item groups.
Click New to add a new item group. Enter the group ID and name and save.
Setup Sales groups
Use the Sales group form to create categories of Salespersons and assign their share of the commission. Once you have created the groups, you can assign the right Salespersons to these groups.
To set up sales groups, go to Sales and marketing> Commissions> Sales groups.
Click New to add a new sales group. Add the Group ID and an appropriate name and save the sales group.
Once you have defined the sales groups, you can add the salespeople that belong to these groups. To add a salesperson to the sales group, click on General>Setup> Sales rep in the Commission sales group form.
In the Sales rep form, select the name of the Salesperson and enter the share of commission that he/she will receive.
Customer setup
Once you have all the above setup ready, you can assign the customer group and sales group to the customers.
Navigate to Sales and marketing> Customers> All customers or Accounts receivable> Customers> All customers click on the Customer account for which you would want to add Commission information.
Expand the Sales order defaults fast tab.
Select the Commission group and the Sales group that you set up to save the information.
Item setup
Assign the Item group that you set up to the Items that are eligible for commission.
Navigate to Product information management> Products> Released products. Click on the product that you wish to edit and expand the Sell fast tab in the form. Select the commission group that you created earlier under Administration> Commission group and save the information.
Commission calculation
You must then specify the commission rate that each salesperson is to receive in the Commission calculation form.
To access this form, navigate to Sales and marketing> Commissions> Commission calculation.
Select the Customer relation and Sales rep relation and define the commission percentage. In this example I have selected customer group ‘East zone’ and sales rep group ‘Group A’.
Under the Based on the group you can choose whether the Commission will be calculated ‘Before line discount’, ‘After line discount’ or ‘After total discount’. In the Basic field, you can select if the commission has to be calculated on the ‘Revenue’ or ‘Margin’.
You can also specify the validity period of this commission calculation. In this example, the Commission calculation has a validity period from 1st Jan 2021 to 31st Dec 2021 with a commission percentage of 35%.
Mark Find next to find the next applicable commission calculation.
Save your setup.
Setup Posting accounts
The next step is to set up the posting accounts for the commission transaction. You can define the commission expense account and offset account in this form.
To set up the posting accounts, navigate to Sales and marketing> Commissions> Commission posting and then select the correct Main accounts against Commission and Commission offset.
Transactions
Post-sales order invoice
Now that we have everything set up to process the commission, we can go ahead and create transactions and track the commissions. I am going to create a sales order with the item that we used earlier in this post and invoice the sales order.
To create the sales order navigate to Sales and marketing> Sales orders> All sales orders.
Next, I am going to create a sales order for customer ‘Forest wholesales’ that we used earlier in this example to set up the commissions group.
Add the item that is eligible for commission in the sales order line.
I am going to confirm the sales order, complete the shipping process and Invoice it. After you have invoiced the sales order, you can view the commission transactions by clicking on Invoice> Journals> Invoice in the Sales order and then clicking on Detail> Commission transactions.
Commission’s transactions explained in this example.
Revenue @ 10 units * $150 = $1500.00
Commission that can be earned by salesreps is 35% on Revenue (35% of $1500) = $525.00
Salesreps’ share of commission
Aaren Ekelund @ 55% of $525.00 = $288.75
Carmen Hamilton @ 45% of $525.00 = 236.25
To view the voucher entries for the commission transaction, close the Commission transactions form and click on the Voucher button in the Invoice journal form.
You will see that the commission expense account is debited, and the Commission payable account is credited.
Track Sales commission
To get a view of all the sales commissions in your company, you can quickly print the Commission transaction list report.
To print this report, navigate to Accounts receivable> Inquiry and reports> Commissions transaction list report.
You can use the filters to get specific results and then click Ok to print the report.
This concludes our blog on the Commission calculation and tracking process in D365 Finance.
Check out the blog space in our website to find more such interesting topics on D365 Finance and Operations.